brianfive, ropats16
@brianfiveConnect your Smart Contract to a Front End Application.
Created by:
About this lesson
Congratulations on making it to this final tutorial in a series on smart contract development of the ERC-721 standard, a.k.a. NFTs. In the first in the track, you created a basic smart contract using Remix. Then a shift to a dedicated developer's environment to create and deploy an NFT contract to an actual test network. In lesson 3 you added tiers to your NFTs, finally learning to make your contracts air-tight by building your own automated testing suite in the fourth of the series.
But to create a full stack decentralised application, we also need a UI, or front-end for users to interact with. In this lesson that is exactly what we're going to create.
Expect somewhere from one to four hours to complete the lesson, depending on your prior experience and the need to grasp new concepts. We encourage you to maintain a steady pace and encourage breaks for rejuvenation. So remind yourself to "go touch grass" and appreciate nature's role in enhancing our well-being. 🌱 Relish your journey in development in a good state of mind and body.
What are we building
Now we're going use all of this knowledge and create a basic NFT minting application that displays the three tiers of NFTs created in our smart contract and gives users a one-click option to mint them. Once minted, users will be redirected to a page that displays information of their mint. We'll need some extra magic to make that all happen.
For handling wallet connections to our application, we'll be introducing you to RainbowKit. And using the provided hooks from WAGMI, we can check the connection to the wallet and call functions from our smart contract through the front-end. RainbowKit and WAGMI are just another couple of shining examples of open source public goods. We love open source at Developer DAO. And public goods are gooood!
Let's breakdown the lesson
- Set up our development environment with TierNFT project
- Create main application with Next.js, RainbowKit and WAGMI
- Create an Index page as main entry point for displaying the app content
- Create NFT cards
- Enable minting of NFTs in the application
- Lesson Summary
Tools to get the job done
- RainbowKit - a React library for out-of-the-box wallet management
- Next.js - a React framework for building a full-stack app
- viem - a compact JavaScript library for interacting with the Ethereum eco-system
- WAGMI is a collection of React hooks that allows us to work effectively with Ethereum. We're using v1.
- Alchemy is an RPC provider that lets our app connect to the blockchain
- WalletConnect - is a bridge that connects Decentralized Applications (DApps) to your web3 wallet
* always make sure you access up-to-date release notes and documentation
Let's dive in!
Getting started
We're going to start where we left off in Write Automated Tests for your TierNFT.
Open your code editor and cd into the tierNFT project directory. For all things related to our front-end we are going to create a new sub-directory within our project's root directory to maintain good practice, keep our code clean, and be easy to locate and read. The first step is to initiate a Next.js application.
💡
Make sure you are in your project's root directory before continuing.
The next command creates a sub-directory named frontend inside our root directory and sets up all the necessary files and folders within it:
First switch to the root directory of your project. For example:
cd /d_d_academy/tierNFT
# use the RainbowKit starter to create our your Next.js application with RainbowKit
npm init @rainbow-me/rainbowkit@0.2.11 --force
All you'll need to do is type the name of your project, which is frontend:
🌈 Welcome to RainbowKit!

✔ What is the name of your project? … frontend

🚀 Creating a new RainbowKit app in ((path)):/d_d_academy/tierNFT/frontend
When this command finishes running you'll see:
🌈 Done! Thanks for using RainbowKit 🙏
Once the setup is complete, we open the frontend directory and get cracking.
cd frontend
💡
Bug fix: You'll need to manually edit frontend/package.json and change "@rainbow-me/rainbowkit": "^2.0.0", to "@rainbow-me/rainbowkit": "^1.0.0",. This lesson is based on RainbowKit 1.x.
Try running the site:
npm install
npm run dev
You'll see a message that says which url to view your site at. It should say http://localhost:3000. Open that url in your browser to see if everything is working as expected. We'll be grabbing a valid projectID shortly.
The Front-end
For users to easily interact with our smart contract and mint the NFTs we must provide an interface. A simple process that is easily accessible. Let's start by creating a way to handle wallet connections.
The Main Application
RainbowKit and its dependencies are already installed and ready-to-go.
To get this setup we need to start working on the pages/_app.tsx file in the /frontend/pages directory. The file should look something like this from our initial setup:
import "../styles/globals.css";
import "@rainbow-me/rainbowkit/styles.css";
import { getDefaultWallets, RainbowKitProvider } from "@rainbow-me/rainbowkit";
import type { AppProps } from "next/app";
import { configureChains, createConfig, WagmiConfig } from "wagmi";
import {
  arbitrum,
  goerli,
  mainnet,
  optimism,
  polygon,
  base,
  zora,
} from "wagmi/chains";
import { publicProvider } from "wagmi/providers/public";

const { chains, publicClient, webSocketPublicClient } = configureChains(
  [
    mainnet,
    polygon,
    optimism,
    arbitrum,
    base,
    zora,
    ...(process.env.NEXT_PUBLIC_ENABLE_TESTNETS === "true" ? [goerli] : []),
  ],
  [publicProvider()],
);

const { connectors } = getDefaultWallets({
  appName: "RainbowKit App",
  projectId: "YOUR_PROJECT_ID",
  chains,
});

const wagmiConfig = createConfig({
  autoConnect: true,
  connectors,
  publicClient,
  webSocketPublicClient,
});

function MyApp({ Component, pageProps }: AppProps) {
  return (
    <WagmiConfig config={wagmiConfig}>
      <RainbowKitProvider chains={chains}>
        <Component {...pageProps} />
      </RainbowKitProvider>
    </WagmiConfig>
  );
}

export default MyApp;
- import '@rainbow-me/rainbowkit/styles.css'; gives us some basic styling from Rainbowkit.
- import { getDefaultWallets, RainbowKitProvider, } from '@rainbow-me/rainbowkit'; returns the default wallet provider option and a RainbowKit Provider to "wrap" around our app so that we can use its features throughout the app's pages and components.
- import { configureChains, createConfig, WagmiConfig } from "wagmi"; provides a way to configure the WagmiConfig wrapper for our app based on the chains and providers of our choice along with some other customisations.
- import { alchemyProvider } from 'wagmi/providers/alchemy'; and import { publicProvider } from 'wagmi/providers/public'; give us the provider configs for the providers we will be using. In our app we are using an alchemyProvider along with a fall back publicProvider. A provider allows our application to communicate with a blockchain.
Next we'll be configuring our application.
We save our configuration in a file called .env in the root of our frontend directory.
Create a new .env.local file with this content, and we'll be filling it in with real content next.
NEXT_PUBLIC_PROJECT_ID=
NEXT_PUBLIC_ALCHEMY_ID=
NEXT_PUBLIC_CONTRACT_ADDRESS=
NEXT_PUBLIC_ENABLE_TESTNETS=true
Add your NEXT_PUBLIC_ALCHEMY_ID. This is your API Key from Alchemy.
Our dApp is also using WalletConnect, so we need a projectID from the WalletConnectCloud. So go and set up an account and grab that ID. You'll be done in a few minutes 🤗
For this application we will continue using the amoy Polygon testnet. Other chains can be added simply using the following syntax: chain.chain_name. For custom providers, like the alchemyProvider we can pass in our private apiKey as well.
Lastly add your NEXT_PUBLIC_CONTRACT_ADDRESS which is the address of your deployed contract on Amoy testnet.
Now we need to add these new environment variables to our codebase.
In _app.tsx Replace projectId: 'YOUR_PROJECT_ID', with projectId: process.env.NEXT_PUBLIC_PROJECT_ID || "",.
We're going to continue to use Alchemy as our provider for connecting to amoy testnet.
Please make these changes to _app.tsx:
- replace import { publicProvider } from "wagmi/providers/public"; with import { alchemyProvider } from "wagmi/providers/alchemy"; at the top of the file.
- in configureChains section, replace [publicProvider()] with [alchemyProvider({ apiKey: process.env.NEXT_PUBLIC_ALCHEMY_ID || "" })].
- remove zora from wagmi/chains import and from the configureChains array.
- manually add the polygonAmoy related sections as seen below. The Amoy Polygon testnet is newer than the libraries this tutorial is using. Normally you'd search and replace testnet with a simple amoy value though instead we need to manually add.
Here is the complete _app.tsx with changes to use Amoy.
import { getDefaultWallets, RainbowKitProvider } from "@rainbow-me/rainbowkit";
import "@rainbow-me/rainbowkit/styles.css";
import type { AppProps } from "next/app";
import { configureChains, createConfig, WagmiConfig } from "wagmi";
import { arbitrum, base, mainnet, optimism, polygon } from "wagmi/chains";
import { alchemyProvider } from "wagmi/providers/alchemy";
import { jsonRpcProvider } from "wagmi/providers/jsonRpc";
import "../styles/globals.css";

import { Chain } from "wagmi";

export const polygonAmoy = {
  id: 80002,
  name: "Polygon Amoy",
  network: "polygonamoy",
  nativeCurrency: {
    decimals: 18,
    name: "MATIC",
    symbol: "MATIC",
  },
  rpcUrls: {
    public: { http: ["https://polygon-amoy-bor-rpc.publicnode.com"] },
    default: { http: ["https://rpc-amoy.polygon.technology"] },
  },
  blockExplorers: {
    etherscan: { name: "OK LINK", url: "https://www.oklink.com/amoy" },
    default: { name: "OK LINK", url: "https://www.oklink.com/amoy" },
  },
  contracts: {
    multicall3: {
      address: "0xca11bde05977b3631167028862be2a173976ca11",
      blockCreated: 3127388,
    },
  },
} as const satisfies Chain;

const { chains, publicClient, webSocketPublicClient } = configureChains(
  [
    mainnet,
    polygon,
    optimism,
    arbitrum,
    base,
    ...(process.env.NEXT_PUBLIC_ENABLE_TESTNETS === "true"
      ? [polygonAmoy]
      : []),
  ],
  [
    alchemyProvider({ apiKey: process.env.NEXT_PUBLIC_ALCHEMY_ID || "" }),
    jsonRpcProvider({
      rpc: (chain) => ({
        http: `${chain.rpcUrls.default.http}`,
      }),
    }),
  ],
);

const { connectors } = getDefaultWallets({
  appName: "RainbowKit App",
  projectId: process.env.NEXT_PUBLIC_PROJECT_ID || "",
  chains,
});

const wagmiConfig = createConfig({
  autoConnect: true,
  connectors,
  publicClient,
  webSocketPublicClient,
});

function MyApp({ Component, pageProps }: AppProps) {
  return (
    <WagmiConfig config={wagmiConfig}>
      <RainbowKitProvider chains={chains}>
        <Component {...pageProps} />
      </RainbowKitProvider>
    </WagmiConfig>
  );
}

export default MyApp;
Now that we have our application setup, we can edit the Index Page.
The Index Page
Notice that we are using the page folder routing in our app, which give us an index.tsx page in the /frontend/pages directory. This file work as our homepage at the root level, in our url will be htpp://localhost:3000/ by default.
We'll trim out most of the content in this initial file, and bring in a brand new <TierNFT> React component that will house our main application functionality and will be displayed on the Home page.
We'll be able to identify the component in the index.tsx file by the following two sections:
import { TierNFT } from "../components/tiernft";
<main className={styles.main}>
  <TierNFT />
</main>
Open frontend/pages/index.tsx, remove most of the content, and update the file so that it looks like this:
import type { NextPage } from "next";
import Head from "next/head";
import { TierNFT } from "../components/tiernft";
import styles from "../styles/Home.module.css";

const Home: NextPage = () => {
  return (
    <div className={styles.container}>
      <Head>
        <title>RainbowKit App</title>
        <meta
          content="Generated by @rainbow-me/create-rainbowkit"
          name="description"
        />
        <link href="/favicon.ico" rel="icon" />
      </Head>

      <main className={styles.main}>
        <TierNFT />
      </main>
    </div>
  );
};

export default Home;
Before we can fire up the app for the first time, we need to create that <TierNFT /> component used above.
We'll be growing this component with our main application logic.
Let's create the folders to store these files:
cd frontend
mkdir components
mkdir hooks
Create tiernft.tsx inside the new components directory that will contain the following code:
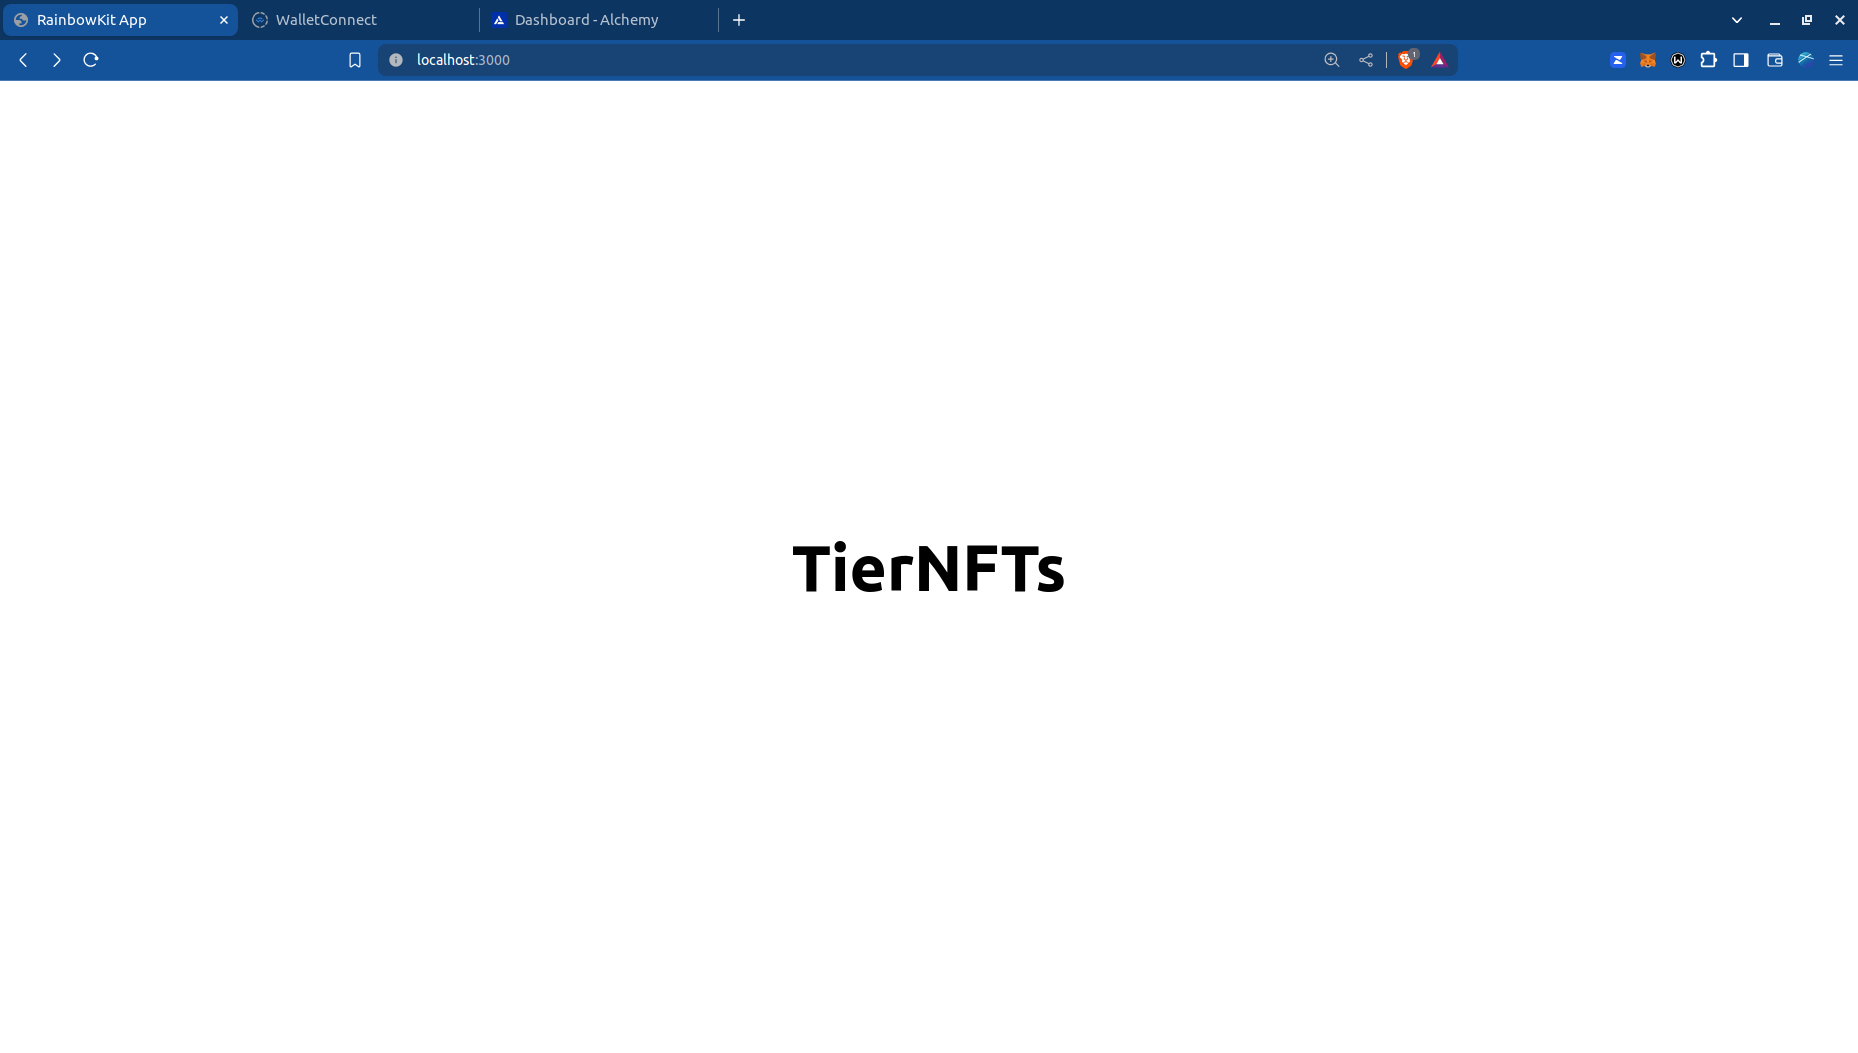
export function TierNFT() {
  return (
    <div>
      <h1>TierNFTs</h1>
    </div>
  );
}
Running the Application
With this setup we can run the npm run dev or yarn dev command in our console and click the returned link (http://localhost:portnumber) to preview our application. This is a good way to debug and see if our code is behaving as expected.
💡
Make sure you are in the frontend directory before running the command.
The preview should look like this:
Overview of Application Structure
A well structured application is easy to maintain and debug when you split it into smaller components. Each component is easier to understand and test.
In this application, we will have these files:
- tiernft.tsx - the main application logic which pulls in various components
- nftcard.tsx - a component that displays each NFT available to mint
- minting.tsx - a component that displays a message while minting
- successfulmint.tsx - a component that displays the final minted NFT and its details
- useMint.ts - logic that handles minting
- useAwaitMintResult.ts - logic that waits for the minting to complete to display the minted NFT
💡
Each file is pasted in this lesson, though if you want to view the full project, is is available at github.com/Developer-DAO/D_D-Academy-lesson-5-frontend-rainbowkit-starter.
The TierNFT Component
We'll start with the main application logic, which is built as a React component.
Let's first stop our development server we had started running earlier, by pressing CTRL-C in terminal. Our code base won't be working correctly until we have all the code added. Or if you leave your server running, don't worry about any errors you see in your terminal, or errors you see in your browser until we've finished.
Add tiernft.tsx with the following code:
import { ConnectButton } from "@rainbow-me/rainbowkit";
import Head from "next/head";
import { CSSProperties, useEffect, useState } from "react";
import { useAccount } from "wagmi";
import TierABI from "../artifacts/contracts/TierNFT.sol/TierNFT.json";
import { NftCard } from "./nftcard";
import { useAwaitMintResult } from "../hooks/useAwaitMintResult";
import { useMint } from "../hooks/useMint";
import { Minting } from "./minting";
import { SuccessfulMint } from "./successfulmint";

const CONTRACT_ADDRESS = process.env
  .NEXT_PUBLIC_CONTRACT_ADDRESS as `0x${string}`;

export function TierNFT() {
  const [isUserConnected, setIsUserConnected] = useState(false);
  const [modalShow, setModalShow] = useState(false);
  const [mintingPrice, setMintingPrice] = useState("0");

  // await for user to connect their wallet
  const { isConnected, address } = useAccount();
  useEffect(() => {
    try {
      setIsUserConnected(isConnected);
    } catch (e) {
      const error = e as Error;
      console.log("Error connecting to user", error.message);
    }
  }, [isConnected]);

  // mint when the mintingPrice is set
  const { mint, isMinting, txData } = useMint({
    contractAddress: CONTRACT_ADDRESS,
    abi: TierABI.abi,
    mintingPrice: mintingPrice,
  });

  // start mint via setting mintingPrice
  useEffect(() => {
    if (mintingPrice !== "0" && mint) {
      mint()
        .then(() => {
          setModalShow(true);
        })
        .catch((e) => {
          setModalShow(false);
          const error = e as Error;
          console.log("Error minting NFT", error.message);
        })
        .finally(() => {
          setMintingPrice("0");
        });
    }
  }, [mintingPrice, mint]);

  // when mint completes, return the minted nft we want to show
  const { mintedTokenId, latestNFTMinted } = useAwaitMintResult({
    abi: TierABI.abi,
    contractAddress: CONTRACT_ADDRESS,
    userWalletAddress: address,
  });

  return (
    <div>
      <Head>
        <title>NFT Minter</title>
        <meta
          name="description"
          content="D_D Academy NFT Minter frontend integration project"
        />
      </Head>

      <header style={header}>
        <h1>TierNFTs</h1>
        <ConnectButton />
        {!isUserConnected && (
          <div style={pleaseConnectWallet}>Please connect your wallet.</div>
        )}
      </header>

      {isUserConnected && (
        <main>
          <div style={NFTFlex}>
            <NftCard
              name="Tier 0"
              imageSrc="/nfts/0_basic.svg"
              alt="basic tier nft"
              onClick={() => setMintingPrice("0.01")}
              disabled={isMinting}
            />

            <NftCard
              name="Tier 1"
              imageSrc="/nfts/1_medium.svg"
              alt="medium tier nft"
              onClick={() => setMintingPrice("0.02")}
              disabled={isMinting}
            />

            <NftCard
              name="Tier 2"
              imageSrc="/nfts/2_premium.svg"
              alt="premium tier nft"
              onClick={() => setMintingPrice("0.05")}
              disabled={isMinting}
            />
          </div>

          {modalShow &&
            (txData ? (
              <SuccessfulMint
                contractAddress={CONTRACT_ADDRESS}
                nftMinted={latestNFTMinted}
                mintedTokenId={mintedTokenId}
                onClose={() => {
                  setModalShow(false);
                }}
                txData={txData}
              />
            ) : (
              <Minting />
            ))}
        </main>
      )}
    </div>
  );
}

const header: CSSProperties = {
  display: "flex",
  flexDirection: "column",
  alignItems: "center",
  justifyContent: "space-between",
};

const pleaseConnectWallet: CSSProperties = {
  marginTop: "20px",
};

const NFTFlex: CSSProperties = {
  display: "flex",
  alignItems: "center",
  justifyContent: "space-evenly",
  gap: "50px",
};
Let's break down the code next.
imports and primary pieces
At the top of the file we import the necessary dependencies for our application. This pulls in the components we're about to add, plus existing libraries.
💡
Here we start to use React Hooks, which are JavaScript functions that manage the state's behaviour and side effects by isolating them from a component.
- Two common hooks we use are useEffect and useState. More on state and the useEffect hook.
- RainbowKit provides us a ready-made ConnectButton.
- We need to use the useAccount hook from WAGMI to check account connection and useContractRead and useContractWrite to interact with our smart contract. We will look into WAGMI and these hooks a little down the line.
- TierABI is our contract's Application Binary Interface (ABI). The ABI helps us interact with the smart contract outside the blockchain or contract-to-contract. You can read more about ABIs here.
- The viem library will assist us with some utilities in our code.
- Once again, useEffect and useState are react hooks that will help us perform side effects and capture the state, respectively.
We're creating a default function called TierNFT that will render our mint workflow. As you can see , we are required to add the CONTRACT_ADDRESS which is displayed in your command line when we deploy the contract. The useAccount hook lets us access account data and check connection status. We will use this as a check to provide access to the minting features of our app. useState lets us store state information such as whether a user is connected. The general syntax for using the useState hook is:
const [variableName, functionToSetVariable] = useState(intialValue)
💡
The initial value also serves as the type for the value assigned. If the initial value is a string, then the values set later must be strings too. The hook can be created without an initial value as well but a good practice is to always choose and pass in an initial value based on the value type we expect to assign to that variable.
We will revisit these state variables later to see their implementation.
Walk through of the major components
Notice our file has some // comment lines. These are used to explain the code. It's highlighting the various steps in the minting process.
- We start by checking if the user is connected to the wallet. If they are, we display the minting options. If not, we ask them to connect their wallet.
- Once user signs in, they see 3 NFT cards. Each card has a name, image and a mint button. We use <NftCard /> component to display each card.
- When user clicks the mint button, we set the minting price and call the mint function from the useMint hook. useMint is a custom hook and demonstrates grouping related hooks together into a new component.
- Once the mint is underway, the application listen to the blockchain for the minting transaction to complete. We use the useAwaitMintResult hook to do this. It returns the mintedTokenId and latestNFTMinted that we can use to display the minted NFT and its details via our <SuccessfulMint /> component.
React Display Components
We have a few components that we need to create to complete our application. These are React components that are used to display the minting process and the minted NFT. They don't have much logic in them are are primarily used to display information passed in from the main application via component properties.
This allows us to reuse components (like the NftCard component) and keeps our tiernft.tsx code clean by leveraging the power of React and its component-based architecture.
Let's just add three of them now and then we'll explain some common patterns.
Create components/nftcard.tsx
import Image from "next/image";
import { CSSProperties } from "react";

export function NftCard({
  name,
  imageSrc,
  alt,
  onClick,
  disabled,
}: {
  name: string;
  imageSrc: string;
  alt: string;
  onClick: () => void;
  disabled: boolean;
}) {
  return (
    <div style={NFTCard}>
      <h2>{name}</h2>
      <Image src={imageSrc} width="200" height="200" alt={alt} />
      <button onClick={onClick} style={NFTMint} disabled={disabled}>
        Mint
      </button>
    </div>
  );
}

const NFTCard: CSSProperties = {
  display: "flex",
  flexDirection: "column",
  border: "2px solid white",
  borderRadius: "10px",
  padding: "20px",
  alignItems: "center",
  gap: "10px",
  fontWeight: "bold",
};

const NFTMint: CSSProperties = {
  fontWeight: "700",
  padding: "5px 20px",
  border: "2px solid white",
  color: "white",
  backgroundColor: "black",
  borderRadius: "5px",
  cursor: "pointer",
};
Create components/minting.tsx
import { CSSProperties } from "react";

export function Minting() {
  return (
    <div style={modal}>
      <div style={modalContent}>
        <h2>Minting...</h2>
        <p>Please be patient, this make take several seconds.</p>
      </div>
    </div>
  );
}

const modal: CSSProperties = {
  position: "fixed",
  left: "0",
  top: "0",
  right: "0",
  bottom: "0",
  backgroundColor: "rgba(0, 0, 0, 0.8)",
  display: "flex",
  alignItems: "center",
  justifyContent: "center",
  textAlign: "center",
  zIndex: "1",
};

const modalContent: CSSProperties = {
  backgroundColor: "#fff",
  padding: "10px 30px",
  borderRadius: "16px",
  color: "#000",
};
Create components/successfulmint.tsx
import Image from "next/image";
import { CSSProperties } from "react";
import { TransactionReceipt, formatUnits } from "viem";
import { useNetwork } from "wagmi";

export function SuccessfulMint({
  contractAddress,
  nftMinted,
  mintedTokenId,
  txData,
  onClose,
}: {
  contractAddress: `0x${string}`;
  nftMinted: {
    name: string;
    image: string;
  };
  mintedTokenId?: bigint;
  txData?: TransactionReceipt;
  onClose: () => void;
}) {
  const { chain } = useNetwork();
  return (
    <div style={modal}>
      <div style={modalContent}>
        <div style={modalContent}>
          <h2>Mint Successful</h2>
          <div style={modalBody}>
            {nftMinted.name && <h3>{nftMinted.name}</h3>}
            {nftMinted.image && (
              <Image
                src={nftMinted.image}
                height="200"
                width="200"
                alt="Minted NFT"
              />
            )}
          </div>
          <div style={modalFooter}>
            <button style={modalButton}>
              {mintedTokenId != undefined && (
                <a
                  href={`https://testnets.opensea.io/assets/amoy/${contractAddress}/${formatUnits(
                    mintedTokenId,
                    0,
                  )}`}
                  target="_blank"
                >
                  View on OpenSea
                </a>
              )}
            </button>
            <button style={modalButton}>
              {txData && txData.transactionHash ? (
                <a
                  href={`${chain?.blockExplorers?.etherscan?.url}/tx/${txData.transactionHash}`}
                  target="_blank"
                >
                  View on Polygonscan
                </a>
              ) : undefined}
            </button>
            <button onClick={onClose} style={modalButton}>
              Close
            </button>
          </div>
        </div>
      </div>
    </div>
  );
}

const modal: CSSProperties = {
  position: "fixed",
  left: "0",
  top: "0",
  right: "0",
  bottom: "0",
  backgroundColor: "rgba(0, 0, 0, 0.8)",
  display: "flex",
  alignItems: "center",
  justifyContent: "center",
  textAlign: "center",
  zIndex: "1",
};

const modalContent: CSSProperties = {
  backgroundColor: "#fff",
  padding: "10px 30px",
  borderRadius: "16px",
  color: "#000",
};

const modalBody: CSSProperties = {
  padding: "20px",
  borderTop: "1px solid #eee",
  borderBottom: "1px solid #eee",
};

const modalFooter: CSSProperties = {
  display: "flex",
  flexDirection: "column",
  gap: "10px",
  padding: "20px",
  justifyContent: "space-evenly",
};

const modalButton: CSSProperties = {
  padding: "10px 20px",
  backgroundColor: "#fff",
  color: "#666",
  border: "0",
  borderRadius: "10px",
  fontSize: "18px",
  fontWeight: "700",
  boxShadow:
    "0 0.2em 0.4em 0 rgba(0, 0, 0, 0.2), 0 0.3em 1em 0 rgba(0, 0, 0, 0.19)",
  cursor: "pointer",
};
Here are some common patterns we can see in these components:
- they all use the .tsx extension which is a TypeScript file that contains JSX.
- each returns an export function. That function name is the React component's name.
- the function accepts an object of properties followed by :{} which are the TypeScript annotations for each property. TypeScript provides meaningful information for your code editor and provides warnings when you try to pass the wrong type of data to a component.
SuccessfulMint component has these properties and types, each explained below:
: {
  contractAddress: `0x${string}`;
  nftMinted: {
    name: string;
    image: string;
  };
  mintedTokenId?: bigint;
  txData?: TransactionReceipt;
  onClose: () => void;
}
- contractAddress is a string that starts with 0x.
- nftMinted is an object with a name and image property.
- mintedTokenId is a bigint type and is optional.
- txData is a TransactionReceipt type and is optional.
- onClose is a function that returns void.
TypeScript annotations don't end up in the final code, they are used while developing your application.
At the end of each file is the styling used by the component. This is a common pattern in React applications using CSS-in-JS styling.
Images for the Three NFT Tiers
The NftCard component uses images to display the NFTs. We need to add these images to our application.
Create a new folder named nfts in the /public directory for saving Tier SVGs:
mkdir -p mkdir -p public/nfts
(-p option creates the parent /public folder as well)
You can find links for downloading the SVGs here:
Save them with the same names as shown in the links above for smooth flow in the code.
💡
Make sure you have downloaded the SVG file and not just saved the URL of the file.
Add Blockchain functionality
So far, we've been building a fairly standard React application in Next.js framework and have configured it to use RainbowKit and WAGMI for wallet connections and blockchain interactions.
We haven't added any blockchain functionality to our application. We'll do that next.
WAGMI is a collection of React hooks that allows us to work effectively with Ethereum. We need to use many of these hooks together to achieve our goal. Instead of sticking them all in one big file, we created two custom hooks to handle the minting process.
The useMint hook is used to mint the NFTs. It takes in the contract address, ABI, and the minting price. It returns a mint function that can be called to mint the NFTs.
The useAwaitMintResult hook is used to wait for the minting to complete. It takes in the ABI, contract address, and the user's wallet address. It returns the mintedTokenId and latestNFTMinted that we can use to display the minted NFT and its details via our <SuccessfulMint /> component.
We'll be adding these hooks to our application next.
Create useMint hook
Let's start with the useMint hook. Let's create a hooks/useMint.ts file and add the following code:
import { parseEther } from "viem";
import {
  useContractWrite,
  usePrepareContractWrite,
  useWaitForTransaction,
} from "wagmi";

export function useMint({
  abi,
  contractAddress,
  mintingPrice,
}: {
  abi: any;
  contractAddress: `0x${string}`;
  mintingPrice: string;
}) {
  const { config } = usePrepareContractWrite({
    address: contractAddress,
    abi: abi,
    functionName: "mint",
    value: parseEther(mintingPrice),
    onError: (e) => {
      console.log("Error minting NFT", e);
    },
    enabled: mintingPrice !== "0",
  });

  const {
    data: mintData,
    writeAsync: mint,
    isLoading: isMinting,
  } = useContractWrite(config);

  const { data: txData } = useWaitForTransaction({
    hash: mintData?.hash,
  });

  return {
    mint,
    mintData,
    isMinting,
    txData,
  };
}
What's happening in useMint?
To mint, we need a contact address to call, the contract ABI that has info about the blockchain mint function, and the minting price.
We use the WAGMI usePrepareContractWrite hook to prepare the contract for writing (wagmi docs) that lets us pass in the contract address, contract ABI and the function name to return a JavaScript function (that we have called mint) that can interact with our smart contract and trigger writing to the blockchain to mint our NFT. This hook returns a config object that we can use to mint the NFTs. Here we pass in the amount of ETH we want to send (in the value parameter).
We then use the useContractWrite hook from WAGMI that accepts our config and then provides us our mint function.
It also returns some additional features for error handling and checking whether the function is running or completed (isMinting). We are assigning well defined names to the returned values for easily calling them later. For example, the data returned is called mintData.
Our custom hook returns that mintData object that contains the transaction hash and the mint function.
We also use the useWaitForTransaction hook to wait for the minting transaction to complete. This hook returns a txData object that contains the transaction receipt. We'll explain useWaitForTransaction shortly.
At the end of the hook, you'll see it returns {mint, mintData, isMinting, txData} which are used in the main application to update the UI and pass values to our useAwaitMintResult hook.
Create useAwaitMintResult hook
Let's add the useAwaitMintResult by creating hooks/useAwaitMintResult.ts file and adding the following code:
import { useEffect, useState } from "react";
import { Log } from "viem";
import { useContractEvent, useContractRead } from "wagmi";

type LogWithArgs = Log & {
  args: { from: string; to: string; tokenId: bigint };
};

export function useAwaitMintResult({
  abi,
  contractAddress,
  userWalletAddress,
}: {
  abi: any;
  contractAddress: `0x${string}`;
  userWalletAddress?: `0x${string}`;
}) {
  const [mintedTokenId, setMintedTokenId] = useState<bigint | undefined>(
    undefined,
  );
  const [latestNFTMinted, setLatestNFTMinted] = useState<{
    name: string;
    image: string;
  }>({ name: "", image: "" });

  // await for mint to complete
  const unwatch = useContractEvent({
    address: contractAddress,
    abi: abi,
    eventName: "Transfer",
    listener(events) {
      if (events.length === 0) {
        return;
      }
      events.forEach((event) => {
        const extendedEvent = event as LogWithArgs;
        const { to, tokenId } = extendedEvent.args;
        if (to === userWalletAddress) {
          setMintedTokenId(tokenId);
          unwatch?.();
        }
      });
    },
  });

  const { data: tokenURI }: { data: any } = useContractRead({
    address: contractAddress,
    abi: abi,
    functionName: "tokenURI",
    args: [mintedTokenId],
    watch: true,
    enabled: mintedTokenId != undefined,
  });

  useEffect(() => {
    try {
      if (tokenURI) {
        setLatestNFTMinted(
          JSON.parse(
            window.atob(tokenURI.substring(tokenURI.indexOf(",") + 1)),
          ),
        );
      }
    } catch (e) {
      const error = e as Error;
      console.log("Error fetching token URI", error.message);
    }
  }, [tokenURI]);

  return {
    mintedTokenId,
    latestNFTMinted,
  };
}
When a NFT successfully mints, an event is emitted from the smart contract. Our useAwaitMintResult hook will listen for this event, so we can display the minted NFT in our final Successful Mint modal.
How does the hook listen for the mint event? Notice we're using WAGMI's useContractEvent hook. We ask it to monitor the Transfer event for our NFT contract.
Yes, "hooks" all the way down. Hooks are often composed from other hooks.
If the blockchain is busy there can be many transfer events happening, so we wait until there is a transaction that matches our wallet address and ignore the others. When the event we want comes in, we'll then discover the tokenId of our freshly minted NFT.
Once we setMintedTokenId(tokenId); another WAGMI hook kicks off below called useContractRead. We use this to retrieve the NFT's tokenURI which we'll parse to find the NFT's metadata, including its name and image.
At the very end of the hook, we return the mintedTokenId and latestNFTMinted to the main application in tiernft.tsx.
There are several steps involved, which is another reason why we created this hook. It keeps the logic focused on the task at hand and makes it more obvious what inputs values the hook needs, and what output values it is returning to the component using our hook.
Let's Mint some test NFTs
Now our preview should look like this once a wallet is connected:
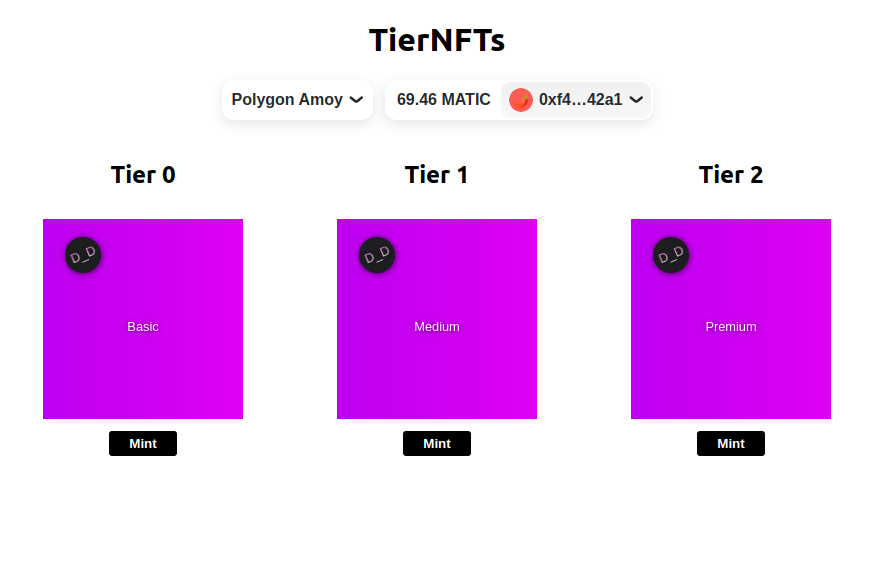
Try minting these NFTs and check your wallet's profile on https://testnets.opensea.io/YOUR_WALLET_ADDRESS.
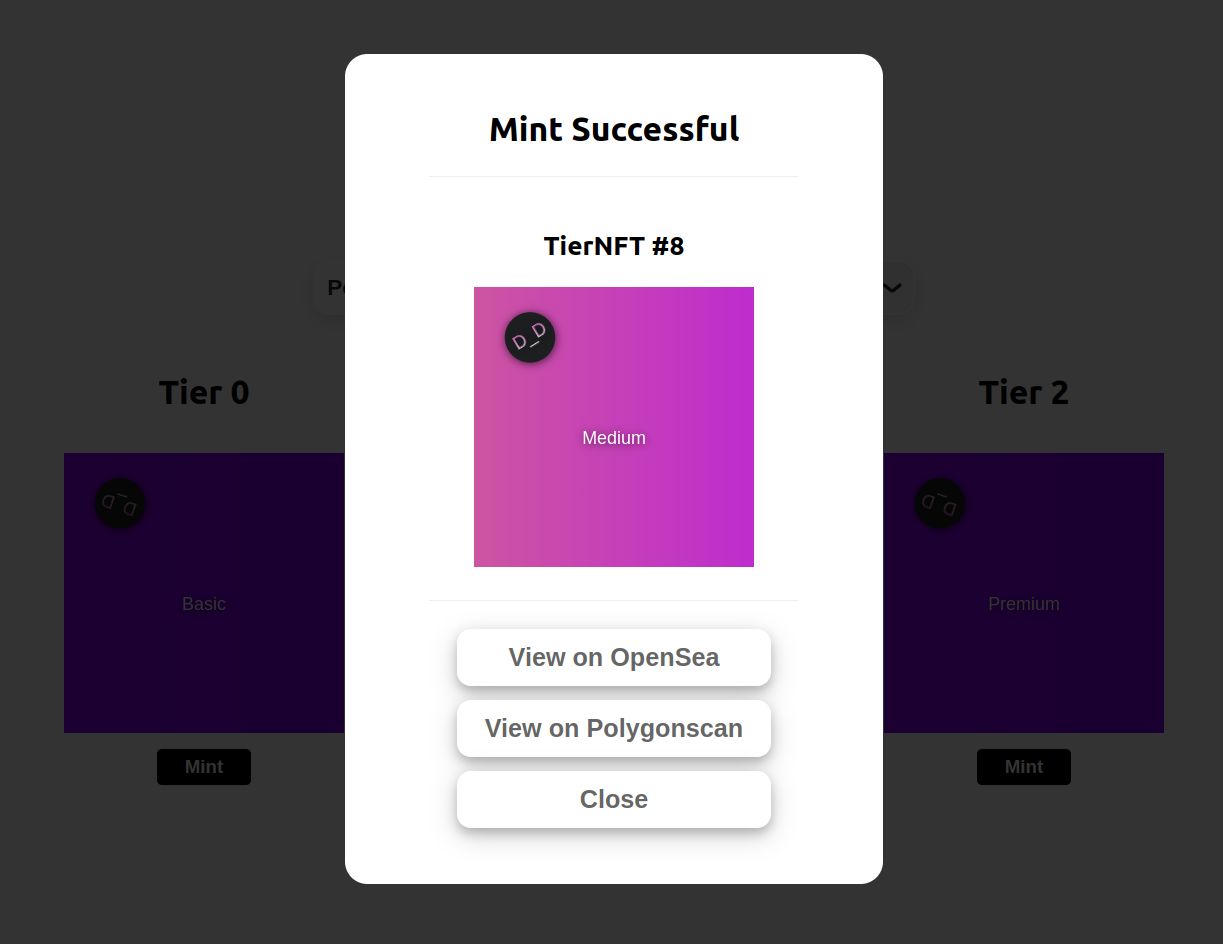
The final modal should look like similar to this:
Connect your wallet and Sign in to start the quiz
Fin.
Hoorah! We've done it. Pat yourselves on the back and get some ice cream!
Right from learning the basics of smart contract development using solidity to creating a full stack decentralised NFT Minting Application.
Stay tuned for more!